Baking 101: Red Velvet Brownies
On a baking craze recently since we've got to fully utilise the holidays! On top of that, ZY and I live like so close to each other, so 方便 to bake anytime! We can bake until late at night and her parents won't mind, still invite me to stay for dinner haha, they're such nice and friendly folks!
This time around, ZY wanted to bake "Red Velvet Brownies"! Glad to say it is a success! YAY so happy when everything works out in the end. As usual, we got the recipe off the internet (http://www.myrecipes.com/recipe/red-velvet-brownies-50400000108664/).
There are less details and it might not be accurate without step-by-step pictures (it depends), so it truly depends on your luck. There are some minor changes/adaptations of the recipe so I'll note them down in blue beside the original online recipe.
Ingredients
- For the batter:
- 1 (4-oz.) bittersweet chocolate baking bar, chopped [1/2 cup of any bittersweet chocolate you can find. We chose to use chocolate chips that had a similar taste]
 |
| Didn't snap a shot but this is what I was referring to |
- 3/4 cup butter
- 2 cups sugar [icing sugar: it should have the texture of flour]
- 4 large eggs
- 1 1/2 cups all-purpose flour [we used self-raising flour instead, but I think they should be roughly about the same]
- 1 (1-oz.) bottle red liquid food coloring [1/8 cup]
- 1 1/2 teaspoons baking powder
- 1 teaspoon vanilla extract
- 1/8 teaspoon salt
Preparation
- 1. Preheat oven to 350°. Line bottom and sides of a 9-inch square pan with aluminum foil, allowing 2 to 3 inches to extend over sides; lightly grease foil. [we couldn't find a 9-inch pan so we used the 10-inch pan instead, which works fine]
- 2. Microwave chocolate and butter in a large microwave-safe bowl at HIGH 1 1/2 to 2 minutes or until melted and smooth, stirring at 30-second intervals. Whisk in sugar. Add eggs, 1 at a time, whisking just until blended after each addition. Gently stir in flour and next 4 ingredients. Pour mixture into prepared pan.
 |
| The first mix |
 |
| Messy table |
 |
| Look at the gorgeous folds |
- It seems a little too pink at first, but after cooking it, it turned into reddish-brown.
- 3. Bake at 350° for 44 to 48 minutes or until a wooden pick inserted in center comes out with a few moist crumbs. Cool completely on a wire rack (about 2 hours). [we baked at 175 degree celsius over a longer period of time because we were afraid it would overflow. Just a tip, make sure you check constantly on the mixture in the oven so that it won't be burnt or uncooked or any other problems. Also, instead of using high temperature within a short timespan, if time allows, use a lower temperature over a long timespan. This ensures that it is evenly cooked]
The top is a little brownish in colour but the inside is a gorgeous reddish-brown.
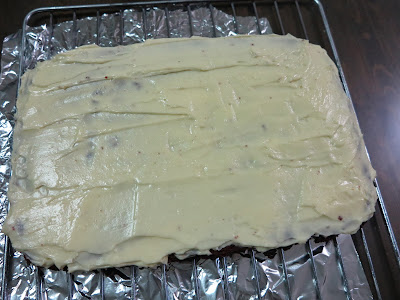
- 4. Lift brownies from pan, using foil sides as handles; gently remove foil. Spread Small-Batch Cream Cheese Frosting on top of brownies, and cut into 16 squares.
Now, moving onto the cream cheese frosting (http://www.myrecipes.com/recipe/cream-cheese-frosting-50400000108682/). Take note, that you can do the cream cheese frosting while your mixture is in the oven to save time!
Ingredients
- 1 (8-oz.) package cream cheese, softened [1 cup: we used an entire packet of cream cheese]
- 3 tablespoons butter, softened
- 1 1/2 cups powdered sugar [icing sugar]
- 1/8 teaspoon salt
- 1 teaspoon vanilla extract
- [we added in some hot water, can't remember how much, because the frosting seemed a little thicker than usual]
Preparation
- Beat cream cheese and butter at medium speed with an electric mixer until creamy. Gradually add powdered sugar and salt, beating until blended. Stir in vanilla.


0 comments